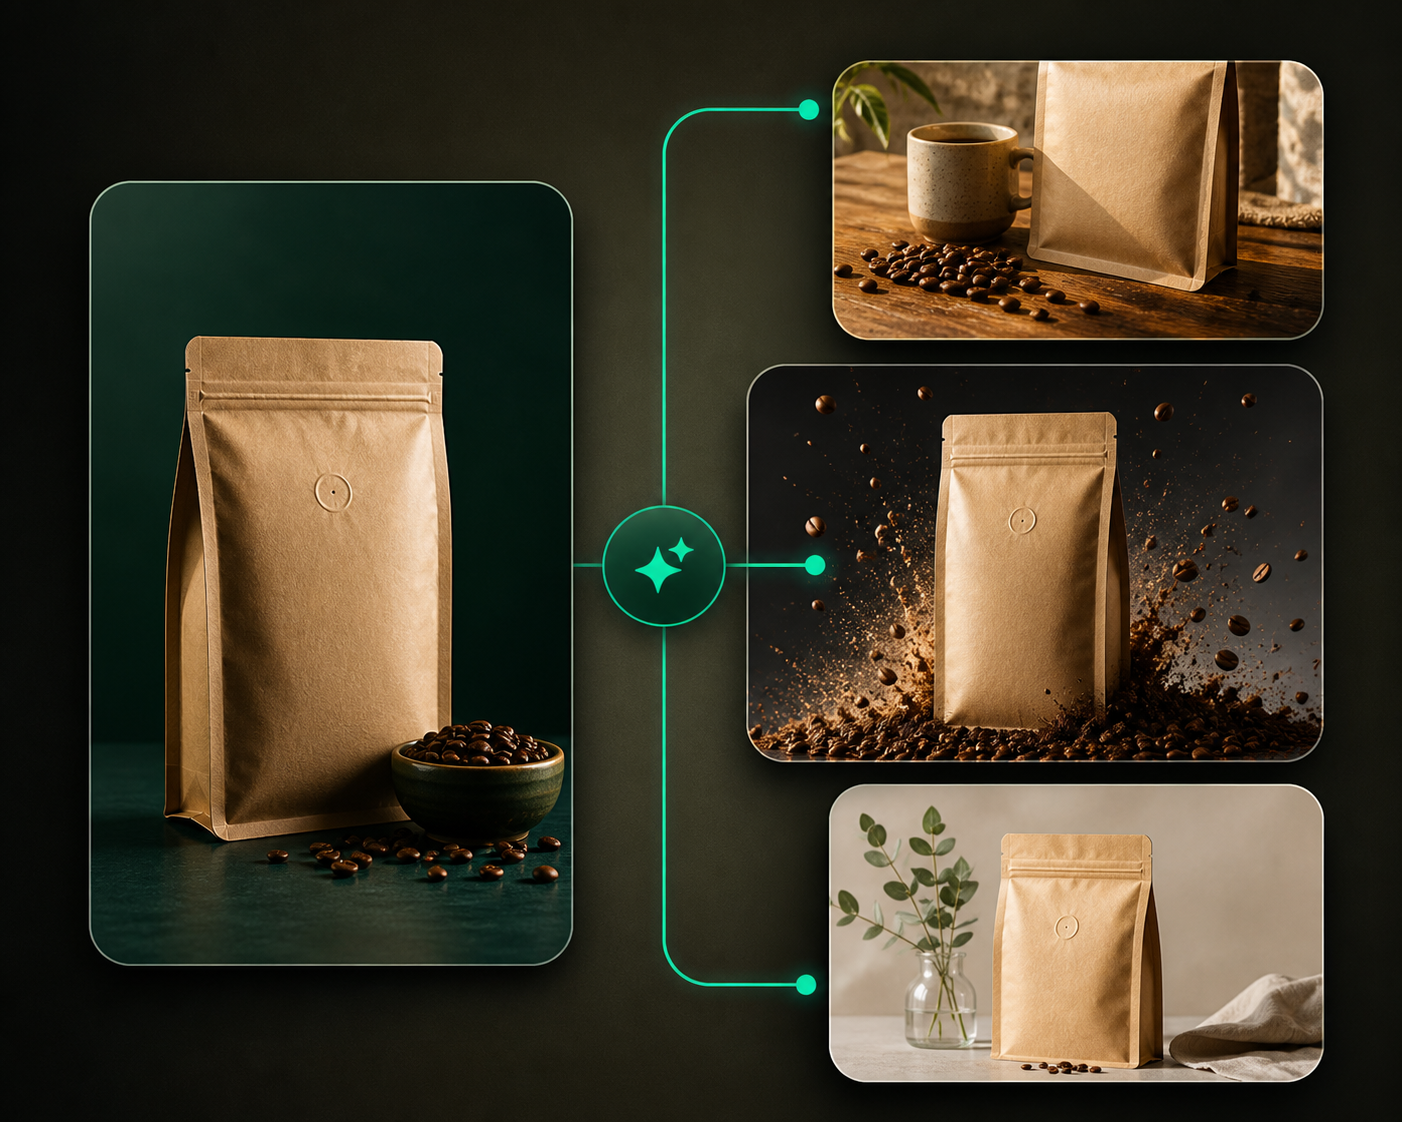
Background removal creates a clean product cutout that Prizer can use for studio scenes, marketing images, and downloads.
Use this guide when
you need a transparent product cutout or when the original background is making generation harder.
Before you start
Choose a source image where the product edges are visible. Thin straps, glass, reflective surfaces, shadows, and furry textures may need a cleaner source photo for best results.
Remove a background
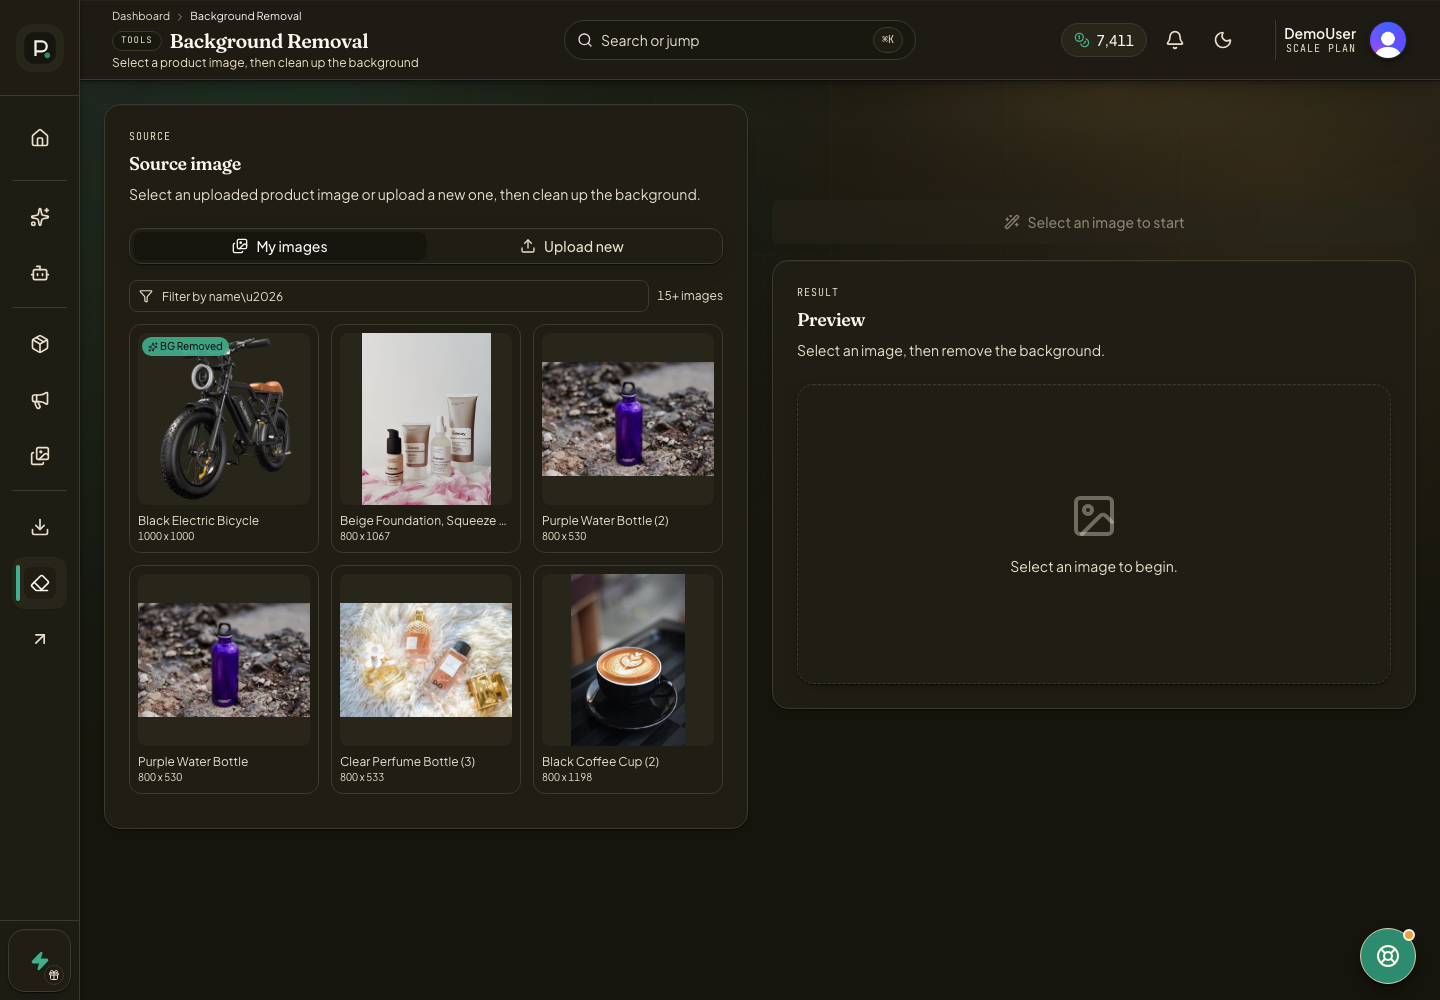
Open BG Removal from the dashboard navigation.
Choose an image from My images or switch to Upload new. Use Products first if you need to check which source images are available.
Select the product image and start background removal.
Review the result preview before using it in another workflow.
Download the cleaned PNG when you need the cutout outside Prizer.
Get cleaner edges
Use a photo where the product is in focus and separated from the original background. Contrast helps. Transparent, reflective, furry, glossy, or thin products can be harder to separate cleanly. If you need to choose a better source first, see Upload your first product image.
If the preview looks wrong, try a simpler source photo before generating new scenes from that cutout.
What should I send support for a background issue?
Send the original upload, the background removed preview, and a short note about what should have been preserved.